Sunday 9 June 2013

Taste a Rainbow


The rainbow cake has been very popular of late. I've come across various types of desserts with splashes of rainbow. I was quite hesitant to try due to the colorings involved. However, my god-daughter was intrigued by it when I showed her the pictures. Hence, when she requested for a Black Forest Cake for her 11th birthday, I decided to create the cake for her with a twist. Instead of using the conventional chocolate sponge cake, I decided to bake the sponge cake with a splash of rainbow hues.

Here's how the sponge cakes look like:


Taste a Rainbow Cake


Cross-section of the cake

Below is the recipe I adapted and modified from Nasi Lemak Lover

6 egg yolks
30g caster sugar
75g canola oil
90ml milk 
135g cake flour
1/2 tsp vanilla essence

6 egg whites
1 tsp lemon juice
90g caster sugar

Wilton gel coloring: Teal, Violet, No-taste Red, Golden Yellow, Kelly Green

For decoration:

Topping Pride Non-dairy Whipping Cream (200ml)
Pink Chocolate Curls
Blueberry Jam
Maraschino Cherries

Method:
  
1. Prepare 6x 7" aluminium trays, no baking spray required.

2. Separate the cold eggs from fridge (easier to separate this way) into two clean mixing bowls. Set aside to return to room temperature.

3. Add sugar to egg yolks, immediately lightly whisk the egg yolks and sugar till light.

4. Add in vanilla extract and canola oil, mix well. Then add in milk, stirring well to combine the mixture.

5. Sift in cake flour, stir till well combined.

6. Whisk egg whites and lemon juice till foamy. Then gradually add in sugar in batches and continue to beat until stiff peaks form.

7. Take 1/3 of meringue and use a hand whisk to mix well with egg yolk batter.

8. Fold in 1/3 of meringue and use a silicone spatula, gently fold with egg yolk batter till slightly combined. Fold in the balance meringue in another 2 intervals and gently fold till well combined.

9. Weigh the total weight of the batter. Total weight obtained was 685g, hence I used about 100g per tray with some remaining batter placed into cupcake liners. Then color them using the colour gels, you can start with 1-2 drops and test as you go along, depending on how deep you wish to achieve the rainbow hues.

10. Bake at 140C for 6mins at low rack, then increase to 170C for another 6mins, depending on your oven since the sponge layers are quite thin.

10. Once baked, keep the sponge cakes in cake caddy to retain the moisture of the sponge cakes.

11. Once the sponge cakes have cooled completely, I applied blueberry jam on alternate layers of the sponge cakes folloed by whipping cream whilst other alternate layers are applied with whipping cream only. ( You may wish to spray sugar solution to the sponge cakes to keep the cakes moist too)

12. Frost the whole cake and top with Maraschino Cherries, blueberry jam and chocolate curls for the final finishing touch.


 The balance of the 85g batter was used to create the following rainbow swirl cupcakes.


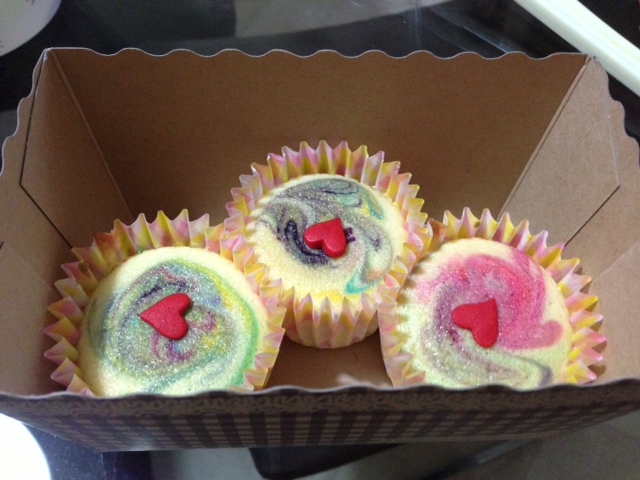
Rainbow Swirl Cupcakes

Verdict by guests:

Sponge cake was soft and the overall taste with blueberry jam goes well the whipping cream, not too sweet. I will definitely use this sponge cake recipe again as a base for future bakes.


Tuesday 4 June 2013

Beet Root Velvety Cakes- Healthy Bakes

I've baked Red Velvet cakes and cupcakes umpteen times but one thing I've been wanting to try is to replace the commercial  red coloring with natural dyes to achieve the distinctive red hue of a typical Red Velvet cake. I still recall vividly the bright red hue of the Red Velvet cake which my Indonesian colleague brought back from Jakarta from a renowned patisserie two months ago. Taste wise is quite palatable and what's more, I was told it was made from natural beetroot.

I then went on a hunt for this earthly vegetable. At last, I found an organic beet root while shopping in Cold Storage. Although the price tag was costly for organic produce, I was so excited and determined to buy it to substitute the deep maroon coloring of this sweet, earthly vegetable from artificial coloring paste gels.

I did my fair share of online research for Red Velvet cake recipes using beetroot and finally settled on the one by Martha Stewart's Red Velvet Cupcakes by replacing the red coloring with about 100ml organic beet root juice.

The resultant cake was a caramel tone but very moist in texture! I was satisfied with the texture but disappointed that the deep red tone was nowhere in sight. A far cry from the picture above. Sigh...

This is the decorated cake with Salted Caramel Cream Cheese frosting for my girlfriend's birthday.

1st attempt- Red Velvet Cake with Cream Cheese Frosting
Velvety Moist Cake

Salted Caramel Cream Cheese Frosting ( Adapted from Baked Bree)

Ingredients:

1 cup unsalted butter at room temperature
8oz or 1 brick of Philadelphia Cream Cheese
1/2 cup Salted Caramel (store bought or home made)
2-3 cups of icing sugar

Method:

1) Cream together the butter & cream cheese
2) Pour in the salted caramel
3) Slowly add the icing sugar and beat for a few minutes until really light and fluffy

 *Home-made version Salted Caramel Sauce ( Adapted from Un Pastiche)

Ingredients

150g sugar
170g heavy cream, preferably room temperature
30g unsalted butter
5-10g sea salt ( or fleur de sel)

Method 

1) Use a deep saucepan to melt the sugar by adding about 20g of water.
2) Stir gradually with a wooden spatula and allow the sugar to caramelize until it turns brownish or amber.
3) Remove from stove and add in the butter.
4) Slowly add the cream to the mixture to prevent splatters
5) Put the saucepan back to the stove and cook until the temperature reaches 108 deg, using a candy thermometer) 
6) Quickly remove from the stove and allow the mixture to cool before adding in the sea salt.
7) Let the sauce cool completely before proceeding with the frosting.
8) Any leftover caramel sauce can be stored in glass jars for up to 5 months in the fridge.


Refused to admit defeat, I used the remaining beetroot to make a purée for my 2nd attempt. After much researching, I adapted the recipe from Sophistimom. Conclusion from various feedback is that the batter has to stay acidic so that the chemical reaction will not turn the red tone to brownish upon baking. For this batch of cupcakes, I achieved a dark mahogany red tone although I wished I could see the bright red as posted in Sophistimom. I frosted them with the remaining Caramel Cream Cheese Frosting from the first cake.

My "sampler" feedback that the cake texture was moist and feels healthy. However, I personally could still taste the earthly beetroot which I prefer not to.

2nd attempt- Red Velvet Cupcake

Just a week after my 2nd attempt, the same colleague who treated me to the Red Velvet cake brought me 2 small beets for me to try baking the "natural" version. I was so delighted and here comes my 3rd attempt. This time, I decided to bake Red Velvet Beetroot muffins using these "cuties" instead.

3rd attempt- Red Velvet Muffins

Recipe adapted and modified from  www.lifestyle food.com.au

Yields 12 muffins

Ingredients:

70g butter
120g caster sugar
1 egg
190g cake flour
2/3 cup buttermilk
1 tsp baking powder
32g Bournville Cadbury Cocoa Powder
1 tsp distilled vinegar
1/2 tsp bicarbonate of soda
1 tsp vanilla extract
2 tbsp dark chocolate chips
2 tbsp Granola & some chopped walnuts/ Almonds
1 beetroot, finely grated

Method:

1) Preheat oven at 180deg
2) Cream butter and sugar till light & fluffy
3) Add the egg and continue to beat till incorporated
4) Add in the sifted dry ingredients and alternate with buttermilk, ending with the sifted flour mixture
5) Add in the grated beetroot ( I steamed for 20 mins before grating)
6) Combine the vinegar and bicarbonate of soda, the mixture will fizzle.
7) Add in the dark chic chips and stir gently into the batter
8) Spoon them into the muffin cups about 2/3 full and garnish sparsely with the Granola bits
9) Bake for about 16-20 min or, until the toothpick comes out clean upon testing


My verdict: Resultant muffins appear dark Mahogany brown instead of the bright red which I anticipated. The muffin tasted fluffy and soft instead of the usual drier muffins sold commercially. The butter milk, vinegar and cake flour play a part to contribute to this texture, I'm quite certain of that. Best of all, I like it moist, thanks to the finely grated beets which retain the moisture quite well!

Well, I concluded that I will just add a lesser amount of red coloring for my next attempt with beets. My experiments in the kitchen will go on...Lol